This report proposes few steps to configure and use Odin.
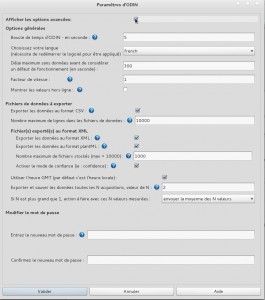
Before use it is necessary to adjust some parameters , either for the ODIN software or for acquisitions used tools.
To do this you can use the main window ODIN called FrontEnd . This part of software allows you to configure ODIN , and run it.
It is also a protection to not close Odin inadvertently . There is a protection password to stop ODIN or close this window.
It should then start ODIN then the user interface from the FrontEnd to access the graphics .
To start the FrontEnd , A shortcut has normally been created on the desktop , otherwise you have to create a new one by going to the source folder to avoid directly manipulate the executable in its installation folder .
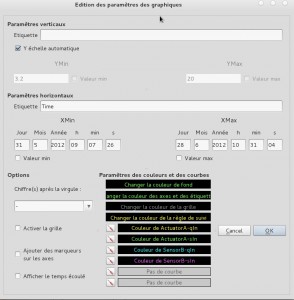
Initialization
Here are the steps that you must perform before starting for the first time Odin (you can later change the configuration but the changes will be taken into account when you restart Odin excepted exceptions listed in the guide).


Utilisation
- Launch ODIN after those configurations done. You just have to click on the bouton
 to start ODIN. The launch could take few seconds (the time needed to connect of the devices to the supervisor). If there is problems, error messages should be displayed , to get more information you should look into the folder “logs/error”.
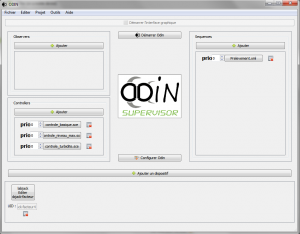
It could be a problem with the configuration, a file unfound or miss interpreted,…
If everething is good, ODIN is started and you can go to the next step
Important!
Error messages are saved in the folder …/logs/error. To go there, File -> Open folder -> Open information folder (data, exported files,…) - Star UI After Odin started you can now start the user interface but clicking on the button

Details of available option of the user interface is presented in the next link -
Used of the user interface
Advanced
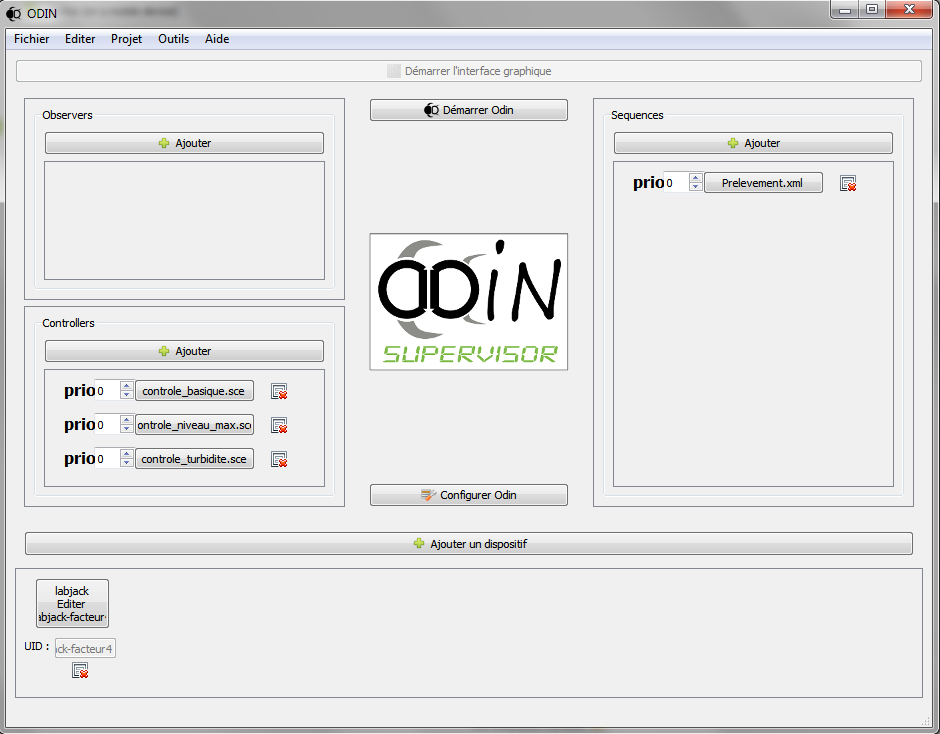
Now that Odin is configured and works, you can add the observers or controllers needed to you experimentation.
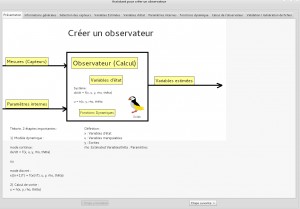
- configuration/creation of an observer
- configuration/creation of an controller
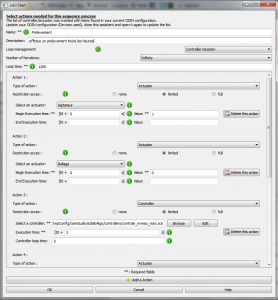
- configuration/creation of a sequence of process
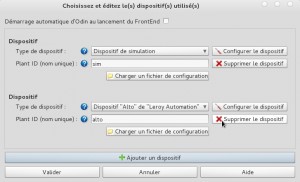
For observers and the controller, you can add an order of priority (the higher the number is the lower observer or controller will override (if same value the order is alphabetical)
The observer / controller / sequence created are visible in the interface and can be changed by clicking on their name and deleted by clicking on the icon with the cross.